@vanessaakupueSubmitted almost 2 years ago

Denis
@Mod8124All comments
- @Mod8124Posted almost 2 years ago
👋 Hi there, good job!
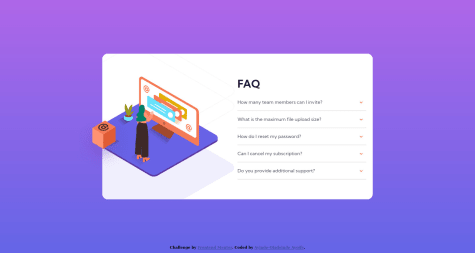
You don't need the starter-code's HTML files just the assets so instead of calling the started-code every time on the nav just call the HTML in the root
<a href="/starter-code/index.html"><span class="num">00</span> HOME </a>(bad)<a href="index.html"><span class="num">00</span> HOME </a>(good)Respect for the links you have many options I'm going to give you want one
// Create a function to read the current URL of the browser and save nav links in a variable
const const links = document.querySelectorAll('.menu a');

const getCurrentRoute = () => {
const currentURL = window.location.href; // Get the current URL
const route = currentURL.substring(currentURL.lastIndexOf("/") + 1); // Extract the route
from the URL

return route;
}
// Create a function to add style to your link. You can also add a class to your links by the way you don't have to remove it because every time you click a link reload the page so also remove the class or style within it
const addStyle = (element) => {
element.style.color = 'white';
element.style.borderBottom = '2px solid white'
element.style.height = '100%'
element.style.lineHeight = '7'
}
// Add the function to your links
links.forEach((link, index) => {
const routes = ['index', 'destination', 'crew', 'technology'];
const currentRoute = getCurrentRoute();

if (currentRoute.includes(routes[index])) addStyle(link);
});
Also for the background(blur) don't worry you have to do it manually in the js because the blur is accordingly to the background color :) also if you don't want to repeat too much your CSS code you can use a CSS methodology called it BEM
🤟 I hope it helps you, Good coding
0 - @andyjv1Submitted almost 2 years ago@Mod8124Posted almost 2 years ago
👌 Good job
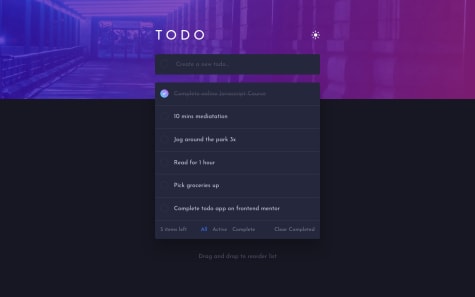
I like it pretty much, if you try to go into full-stack app, try to implement an auth system it's weird that every user shares the same tasks. Because I can edit, and delete your task, and add tasks to your feed.
Also, try to do not to use the same button overall you can do a component for that because they share the same logic you can do only one, then pass the thing that changes as props
// they're the same
<button
onClick={() => setActionsChosen("all")}
style={{ color: (actionsChosen === "all") ? "var(--bright-blue)" : "" }}
>All</button>

<button
onClick={() => setActionsChosen("active")}
style={{ color: (actionsChosen === "active") ? "var(--bright-blue)" : "" }}
>Active</button>

<button
onClick={() => setActionsChosen("completed")}
style={{ color: (actionsChosen === "completed") ? "var(--bright-blue)" : "" }}
>Completed</button>
// just one button component const Button = ({text, actionsChosen}) => { return <button onClick={() => setActionsChosen(text)} style={{ color: (actionsChosen === text) ? "var(--bright-blue)" : "" }} >{text}</button> }also, you don't need that many useState and useEffect for the app, you can use only one for the task and another filter to apply then you can just update the filter and show it to the user
const [tasks, setTasks] = useState([]) // all task
const [filter, setFilter] = useState('All'); // filter to apply

const filters = { // object that return the task with filter
All: (tasks) => tasks,
Active: (tasks) => tasks.filter((task) => !task.completed),
completed: (tasks) => tasks.filter((task) => task.completed),
};

const filteredTasks = filters[filter](tasks);

const changeFilter = (value) => {
setFilter(value);
};

// then just render the filterTask and update by the changeFilter
{filteredTasks &&
filteredTasks.map((task, index) => <CardTodo key={index} task={task} index={index} />)}
and finally try to avoid using the useEffect for fetching data is making double requests to the server you can this video about it react-18
🤟 I hope it helps you, Good coding
0 - @Eduard38655Submitted almost 2 years ago@Mod8124Posted almost 2 years ago
👋Hola bien hecho!
Revisalo no es responsive para movil, y en pantallas grandes esta inclinado a la izquierda, y no esta aligneado en el centro esto pasa porque estas usando rem, el body siempre tiene que cubrir el total de la pantalla ya que es el principal
body {
width:100%;
height:100vh;
}
tambien en tus css siempre empieza por mobile y terminas en desktop es mejor para confimar que tu web es responsive en los medias queries es mala practica volver a poner todas las propiedas de nuevo solo pon las que van a cambiar, tambien siempre usa px en los media queries para identificar mas rapido el dispositivo(mobile,table,etc)
body { // body en mobile
width: 100%;
height: 100vh;
display: flex;
justify-content: center;
align-items: center;
justify-content: space-evenly;
flex-direction: column;
background-color: hsl(204, 43%, 93%);
font-size: 1.25rem;
}
@media screen and (min-width:600px) {
.body { // solo escribe la propiedad que cambia
font-size: 1.4rem;
}
}
🤟Espero te ayude, Buen codigo.
Marked as helpful0 - @LucasNahuelSubmitted almost 2 years ago
- @Kaipi01Submitted over 2 years ago@Mod8124Posted over 2 years ago
Hello Well done!
Your code is hard to read, first, always put all your variables on the top of the file especially if you use
constto avoid hoisted also if youasync and awaitalways usetry and catchwhat would happen if the API failed your app too so you need to handle that.Also, it's kinda confusing what is this
    capital = [],
    languages = [],
    currencies = [],
    tld = [],
    borders = [];
And the first look Idk what are these variables, it's better to implement if you use this
const country = {
     capital = [],
    languages = [],
    currencies = [],
    tld = [],
    borders = [];
}
Now I Know all these variables are about the country, if you want to see more good practices and legible code you can see clean-code-javascript
I hope it helps you, Good coding 🤟
Marked as helpful1 - @AyoifeSubmitted over 2 years ago
- @SimplyvodaSubmitted over 2 years ago@Mod8124Posted over 2 years ago
Hello Well done!
it's because you have to check if the value of the input is empty
if (inputText.value.length > 1)notif (inputText !== null)here is checking if the variableinputTextexits and has a different value of null, and notinputText's valueI hope it helps you, Good coding 🤟
Marked as helpful0 - @naufalf25Submitted over 2 years ago@Mod8124Posted over 2 years ago
Hello Well done!
Mmm, I think there are many ways to do that I'm going to show two ways, you choose whatever you want it.
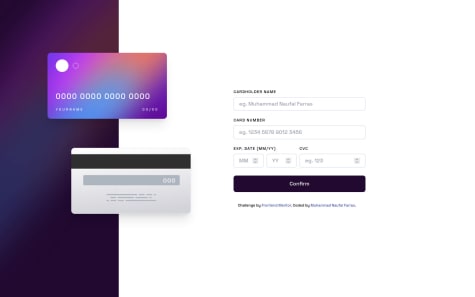
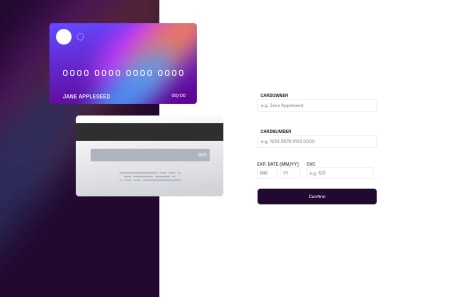
Html(example)
<input type="text" name="card" id="inputCard">- First way
//First, select the input a saved it in a variable const inputCard = document.querySelector('#inputCard') //Then create a function that watches the input value const handleSpace = event => { if (event.target.value.length === 4 || event.target.value.length === 9 || event.target.value.length === 14) { event.target.value += ' ' } } // It's simple if the value.length === 4 || value.length === 9 (every four number), the function add space to input value //Add event `input` to the input (this is an event that sees every change of the input) inputCard.addEventListener('input', handleSpace)- Second way
//First, select the input a saved it in a variable
const inputCard = document.querySelector('#inputCard')

// Create a variable count, start from zero and add one until 4, if the count is equal to zero, the function adds space to the input value

 let count = 0;

//Create a function that sees if count === 4, if equal add space and restart the count to zero
   const handleSpace = (event) => {
        if (count === 4) {
            event.target.value += ' ';
            count = 0;
        }
        count +=1
       }

//Add event `input` to the input (this is an event that sees every change of the input)
 `inputCard.addEventListener('input', handleSpace)`
I hope it helps you, Good coding 🙌
1 - @websebarzSubmitted over 2 years ago@Mod8124Posted over 2 years ago
Hola Buen trabajo!,
Para este challange es cuando el usuario hace submit, ademas al hacer un message custom hay que hacerlo manual el require del input te verifica cuando lo envias al server directamente pero eso usualmente solo se utiliza en php, en front se utiliza fetch, axios, HttpClient para enviar data al server siempre que algo sea dinamico hay que usar hooks
  const message = ''Please a provide a valid email"
  const [isInvalid, setInvalid] = useState(false);
   const isEmail = ^[\w-\.]+@([\w-]+\.)+[\w-]{2,4}$;

   const handleSubmit = (event) => {
   event.preventDefault();

    const { name } = event.target;

    if (name.value.match(isEmail)) {
    event.reset()
   isInvalid(false)
  } else {
   isInvalid(true)
 }
 }
}
En your jsx agregas condicionales si es
isInvalidpor ejemplo y agregas el event onSubmit a tu form<form onSubmit={handleSubmit}> <div> <input type="text" name="name" class={isUnvalid ? 'isUnvalid':'isValid'}/> // si es invalid el input se activa la clases isUnvalid sino is valid {isUnvalid && <img src=".src/img/icon-fail.svg">} // se el icon de fail si es invalid </div> {isUnvalid && <p>{message}</p>} // se muestra el mensage </form>En resume el require en el input es una validacion del html, si quiero mensajes distintos hay que hacerlos manual
Espero te ayude, Good Coding...
Marked as helpful0 - @jlmunozfdevSubmitted over 2 years ago@Mod8124Posted over 2 years ago
Hola buen trabajo!
El margin y el padding no te preocupes es pura practica práctica, puedes usar los figma s pero ya q no cuentas con estos puedes usar pixel perfect y puedes practicar de manera directa en css battle es mas facil por q ves los resultados de una xd
Usaste muchas clases pero no te preocupes hay una metodología(escribir de manera eficiente el css) de css que hace lo mismo llamada bem pudiste haber ahorrado un montón de código usándola ya que usaste mucha clases que solo cambian una cosa por ejemplo
Tu css
.card__supervisor {
    display: flex;
    flex-direction: column;
    border-top: 4px solid var(--cyan);
    border-radius: 7px;
    box-shadow: 0px 10px 24px -4px rgba(0,0,0,0.5);
}

. card__team {
    display: flex;
    flex-direction: column;
    border-top: 4px solid var(--red);
    border-radius: 7px;
    box-shadow: 0px 10px 24px -4px rgba(0,0,0,0.5);
}

.card__karma {
    display: flex;
    flex-direction: column;
    border-top: 4px solid var(--orange);
    border-radius: 7px;
    box-shadow: 0px 10px 24px -4px rgba(0,0,0,0.5);
}
Con bem
.card {
display: flex;
    flex-direction: column;
    border-top: 4px solid var(--orange);
    border-radius: 7px;
}
.card--supervisor {
box-shadow: 0px 10px 24px -4px rgba(0,0,0,0.5);
}
.card--team {
box-shadow: 0px 10px 24px -4px rgba(0,0,0,0.5);
}
.card--karma {
box-shadow: 0px 10px 24px -4px rgba(0,0,0,0.5);
}
ves es mas fácil de aplicar y ahorras un montón de código css, solo crea una clase con los valores por defecto y otra con modificaciones. En el html:
<div class="card card--supervisor" ></div>
<div class="card card--team" ></div>
<div class="card card--karma" ></div>
Ahora cada div tiene los mismo estilos pero cambia el shadow
Espero te sirva, good coding 👌
Marked as helpful0 - @jhonnymosqueraSubmitted over 2 years ago@Mod8124Posted over 2 years ago
Hola buen trabajo!
Trata siempre de poner todas tu variables en el top del archivo de js en especial si usas
constoletya q no cuenta con hoisted, intenta siempre de seguir una convención por ejemplo todas las variables en el top, en el medio funciones y en la parte de abajo las llamadas de funciones y eventos de esta manera hace que tu código sea más legible para otros y para tiTe puedes ahorrar mucho código si seleccionas todos los botones de una
Const btns = document.queryselectorAll('.card__content--li')Después nadamas le asignas el evento btnGris con el método
forEachsimpre trata de evitar el for ya q no te asegura que sea inmutable y de una aplicas programación funcional :)btns.forEach(btb => btn.addEventListener('click',btnGris)Espero te sirva y good coding 👍
Marked as helpful1 - @Cdrn19Submitted over 2 years ago@Mod8124Posted over 2 years ago
Hola buen trabajo!
Usualmente si usas css modules o javascript modules en vanilla, tienes que implementar un empaquetador como
webpackovitesi no lo haces haces muchas peticioneshttpla cual afecta al performance y cache del sitio y también te ayuda a minificar el códigoPara q lo tengas en cuenta en tu siguiente proyecto :)
Marked as helpful1 - @MrFougasseSubmitted over 2 years ago@Mod8124Posted over 2 years ago
Hello, well done!
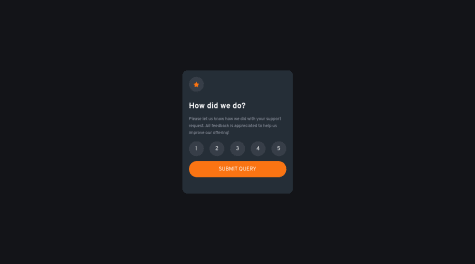
You can reduce the code of your function by passing parameters and always put all your const & let on the top of the file in that way the variable it's the global scope and not the local scope(only available in the function or {}) also it's easy if you select all your buttons with
querySelectorAll//select all the buttons const buttons = document.querySelectorAll('.circleNbr'); const outputNote = document.querySelector('#outputNote'); //then create a function, first, it's going to put all the buttons by default(background & color), and then it's going to change the background & color of what button that user clicked and change the outputNote value function noteSelected(event) { buttons.forEach(button => { button.style.backgroundColor = "#292D38"; button.style.color = "hsl(217, 12%, 63%)"; }); event.target.style.backgroundColor = "hsl(217, 12%, 63%)"; event.target.style.color = "#fff"; outputNote.innerHTML = event.target.innerHTML; btnInHover.classList.add("btnInHover"); } //then assing your function `noteSelected` for every button by method forEach buttons.forEach(button => button.addEventListener('click', noteSelected); //now every button has an click event and that's all :)the function submit is ok, also it's bad practice to call functions in your html, try to always assign event or call directly in your script tag
bad
<button onClick="noteSelected()"></button>good
 const button = document.querySelector('button');
 button.addEventListener('click', noteSelected);
Marked as helpful2 - @migueldeleon012Submitted over 2 years ago@Mod8124Posted over 2 years ago
Hello, Good job!
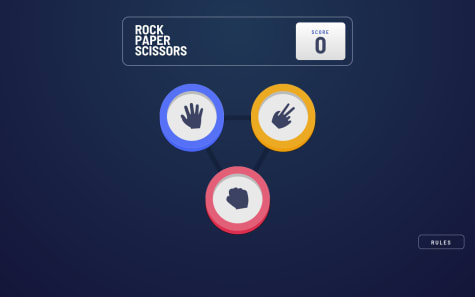
You don't need to create many pages, you only need to change the content of your page you can create a slider, select the tags and change the content for example
//these value are by default when the page start then you change them with your js by clicking a tag
  <h1>Space capsule<h1>
   <img alt="technology image" src="../assets/technology/image-space-capsule-landscape.jpg">

   <button>1<button>
   <button>2<button>
   <button>3<button>
//first create an array with all the content(objects) const contents = [ { title:'Space capsule', img:'../assets/technology/image-space-capsule-landscape.jpg', }, { title:'Spaceport', img:'../assets/technology/image-spaceport-landscape.jpg', }, { title:'Launch vehicle', img:'../assets/technology/image-launch-vehicle-landscape.jp', } ];//then create a variable with an index has to be a let for a change it let index = 0; //then select all your tags and buttons a saved them in a variable const title = document.querySelector('h1'); const imagen = document.querySelector('img'); const buttons = document.querySelectorAll('button'); //now create a function for changing the content and change the index const handleContent = (event) => { index = (event.target.innerHTML -1); title.innerHTML = contents[index].title image.src = contents[index].img }; //minus one because the arrays start from zero //then assign a click event to the buttons buttons.forEach((button)=> button.addEventListener('click', handleContent))Seems like more work but it doesn't if you do it in this way you don't have to create that many pages just only 4 and you can apply the same theory to the project also is reusable I hope you understand if you want to see more visit How to create a slider and javascript dom also you can improve a lot your HTML by using semantic elements also if you try to scale your css you can read about css-methodologies and CSS Architecture
Marked as helpful1 - @CreatorLZSubmitted over 2 years ago@Mod8124Posted over 2 years ago
Hello, good job!
Your component
Homepage.jsis too much you can create more components and always split every functionality into components, for example, if you want to create a different input create a component that receives props what type is going to be that component, also you created manystyles componentsthat are almost the sameconst Month = styled.p` position: absolute; top: 280px; left: 520px; font-size: 14px; color: white; text-transform: uppercase; z-index: 60; @media (max-width: 1260px){ flex-direction: column; top:315px; left:255px; } `; const Year = styled.p` position: absolute; top: 280px; left: 545px; font-size: 14px; color: white; text-transform: uppercase; z-index: 60; @media (max-width: 1260px){ flex-direction: column; top:315px; left:280px; } `; `See they are almost equal so past a prop, and you can save a lot of code
const ParagraphsStyles = styled.p`
top: ${(props)=> props.top ? '280px' : '200px'};
left: ${(props)=> props.left ? '520px'  : '545px' };

@media (max-width: 1260px){
flex-direction: column;
top:${(props) => props.top ? '315px' : '300px' };
left:${(props) => props.left ? '255px' :  '280'  };
}
then you pass
topandleftas props to theParagraphsStylesif you don't pass, the top is going to be280pxelse200pxthis is just an example you can apply that theory in whatever you want<ParagraphsStyles left={true} top={true}> Hola </ParagraphsStyles>See, every time that you need paragraphs just call the
ParagraphsStyles. if you do the same code too many times that is spaghetti code so keep that in mind :)Marked as helpful0 - @arudiansahaSubmitted over 2 years ago@Mod8124Posted over 2 years ago
Hi, Good job!
First, the input has to be in default mode without the border red and, the icon error has to be in display none or visibility: hidden then create a class called
activethis is going to appear if the input isn't valid.form__error { display:none; } .form__input { border-color:pink; } .active.form__error { display:block; } .active.form__input { border-color: red; }then in your file js, you add an event to your input to check is valid or invalid
  const form__input = document.querySelector('.form__input');
  const form__error = document.querySelector('.form__error');
  const REGEXEMAIL = /^\w+([\.-]?\w+)*@\w+([\.-]?\w+)*(\.\w{2,3})+$/;

  form__input.addEventListener( 'input', (event)=>{

       if (e.target.value.match(REGEXEMAIL) ) {
      e.target.classList.add('active');
      form__error.classList.add('active');
  } else {
      e.target.classList.remove('active');
     form__error.classList.add('active');
  }

});
By the way, sometimes the border doesn't appear so we have to use an Outline-properties
Marked as helpful1 - @melinallacuagSubmitted over 2 years ago@Mod8124Posted over 2 years ago
Hola buen trabajo!
Solamente quiero decir, que uses solo un idioma para tus clases español o inglés pero no combinando los 2, es algo confuso
container-tarjetamejorcontainer-cardocontenedor-tarjetaTambién en este caso todas tu clases deberían estar en español por q lo declaraste en el html tag
<html lang="es">A por cierto los tags son para tecnologías que usaste en el proyecto ya q no usaste
styled-componentsXD0 - @btebeSubmitted over 2 years ago@Mod8124Posted over 2 years ago
Hi!
Never post your
.envfile is a security riskYou can set up your config vars on heroku for that, i recommend you see a tutorial about that
Marked as helpful0