@mfkutzSubmitted almost 2 years ago
Surely there is a more efficient solution, but it was what came out at the moment :)

Surely there is a more efficient solution, but it was what came out at the moment :)
Hi Martin,
Your solution looks good! There are two things I'd like to point out that could be improved. First, when you select a rating, all the ratings to the left become highlighted as well. A quick fix would be to put the .remove() lines after the .add() ones. This is because JavaScript runs top to bottom, so your current code is removing the class and then adding it back.
Next, in order to increase your accessibility, I highly recommend using radio inputs instead of buttons for this project. Radio Input 1 is more informative than Button 1 when using screen readers, for example.
There are some additional added benefits to radio inputs as well. If you give radio inputs the same name, say <input type="radio" name="rating" id="1"> and <input type="radio" name="rating" id="2">, it will only allow for one to be selected at a time. You can hide the input circles and customize the labels instead to achieve the same effect. The best part is, you can target the inactive, :hover, and :checked states of the inputs to change the CSS based on whether they have been selected or not and it will remove the CSS from the unselected ones by default, so you don't need to use JavaScript for that unless you want to!
Feel free to check out my solution for an example. https://www.frontendmentor.io/solutions/interactive-rating-component-using-css-flexbox-and-base-javascript-HhhDgY0C8G
Overall, well done! Happy Coding!
Hi guys, again I want to say thank you first for your time here. I am learning a lot from you guys!
Thank you!
Hi Cintia,
Let me start off by saying congratulations on finishing your project. It looks very nice! Your code does not seem to repeat much from what I can see.
The one issue I noticed is that your image on the Thank You screen is broken, so the alt text is showing. Luckily that's a simple issue to fix. For the <img> with src="/images/illustration-thank-you.svg" remove the first '/' so that it looks like src="images/illustration-thank-you.svg". It's a common issue because GitHub doesn't necessarily work the same as your code editor software. Something to look out for in the future.
As for CSS, the margin property can cut down on lines by allowing you to pick different margins all on one line instead of up to 4 separate ones. You can check that out here: https://developer.mozilla.org/en-US/docs/Web/CSS/margin.
If you're interested in alternative solution options, you can look at using <input type="radio"> instead of <button> tags in the HTML which can be better accessibility. Radio inputs also have the benefit that you can only select one if multiple have the same "name" attribute. You can also customize the CSS of their normal, :hover, :active, and :checked states. One thing to note is you would need to target the labels instead of the input itself. For example 'input[type="radio"]:checked + label'.
If you have any other questions feel free to reach out! Happy Coding!
How do I set the height of the line-through span? Tried to use the inline-block and line-height properties but that did not seem to do the trick.
Hi yungfora,
I made an earlier post, but I misunderstood your question. I see that your prices are within a <p> tag. I would recommend changing that to a <div> as <p> tags are specifically meant to wrap text. Then add a <span> around the "$149.99". After, add classes to both <span> elements to modify the appearance in CSS instead of applying that to the <p>:last-of-type and <span>:last-of-type. From there you can make the <div> holding the two spans have the CSS 'display: flex;' and ' align-items: center;' properties. It would look something like the following.
HTML:
<div class="prices"><span class="new">$149.99</span>
<span class="old">$169.99</span>
</div>CSS:
.prices {
display: flex;
align-items: center;
}
That should cause the two <span> elements to center vertically.
Feel free to reach out if you have any further questions. Happy Coding!
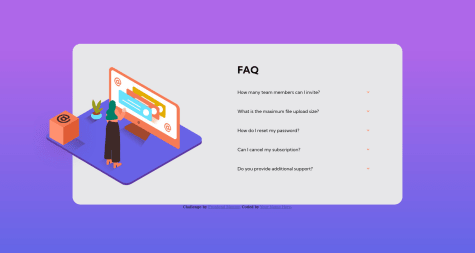
This project for me was pretty disheartening...mainly because I had to repeat it many times to get it to be even decent. Although I don't think it's super awesome, the JavaScript part wasn't that much of an issue as I repeated many sample projects to get a grasp on the logic behind making an accordion. The main issue that I had was dealing with the (what I perceive to be) inside padding inside of the design as well as the z-index part which I could never fully grasp. I attempted to put a z-index on the body but learned that z-index can't be applied to a body because the default positioning is static. I decided to turn in what I have because I didn't want to mess it up any further than I did but I do plan on going back through this project again and creating something better. I would love feedback on this one especially. Thank you all for reading and helping me get this far!
Hi Michael,
If you're interested in an HTML based solution, I highly recommend the <details> and <summary> tags. You can check that out at the following link: https://developer.mozilla.org/en-US/docs/Web/HTML/Element/details. That's what I used when I worked on this project. It was eye opening for me to find out how to do it without any JavaScript. You're more than welcome to look at my project for a live example. You can see my solution here: https://www.frontendmentor.io/solutions/faqaccordioncard-y4MQ1741Ww
A quick note, you will have to hide some of the default styling (there are arrows on the left by default), but that is fixed with the CSS 'list-style: none; '.
If you'd like further clarification please feel free to reach out!
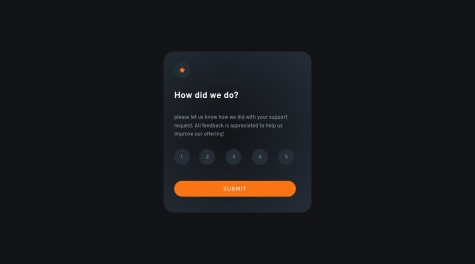
In order to get the user rating input, I used radio buttons and modified its style. I know this isn't the best option to solve this problema due to I have to modify the label a lot to make them look great inside the radio buttons and when I resize the screen this labels get odd. I Know there should be another better solution for this challenge, however, this is the only solution that crossed my mind. Thanks for your time. Any feedback will be welcome!
Hi Jorge,
There are many ways to do every project. It's right as long as it works. That said, I can shine some light on how to do this with the <button> tag instead of <input type="radio">. This method is good if you want to practice JavaScript.
First set up buttons 1-5 as you have done with styling and all for their static and :hover attributes. Then create a class="active". When the active class is added to a button is should look like yours does when it is selected. From there you need to add an event listener in JavaScript. The event type should be 'click'. The necessary order of events will be to remove the active class, if present, from any of the buttons. Then you will need to add the class to the selected button. After that you will want the event to change the text content of the second page to include the number of the clicked button.
Please feel free to check out my solution below for my code if you're interested. I used radio inputs but also used .forEach() to practice JavaScript. https://www.frontendmentor.io/solutions/interactive-rating-component-using-css-flexbox-and-base-javascript-HhhDgY0C8G
If you have any questions or if my comment is unclear, please feel free to reach out to me and I would be happy to explain more thoroughly.
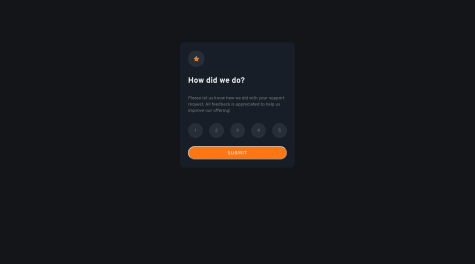
I think I got it for the most part, up until hitting the submit button. I'm not sure how to render the 'Thank You' screen in JavaScript. Or maybe this was supposed to be done with React? Unfortunately, the JS coding part is just too new of a concept for me and I could not figure it out.
Hi Dan, I may be able to help out.
Please note that I recommend only reading as much as you need and trying the rest yourself. You may even find a new way to do things that is different from my suggestions! If you need more assistance please feel free to reach out to me or check out my version of this challenge on GitHub if you'd like.
For the thank you screen, you should design the thank you screen as you normally would. Note that both the rating and thank you screens will appear at the same time at this point. Make sure the thank you screen is all within its own parent element, be it a <div> or any other applicable element type. Also, make sure it is separate from your rating element in your HTML code.
From there you can use HTML or CSS to add the hidden attribute to the thank you parent (HTML) or set the parent to display: none (CSS). (You can search hidden attribute HTML or display: none CSS in your search engine for more details.)
Then you can add to your event listener in JavaScript to change which element is hidden. You can use JavaScript to change the HTML or CSS you used to remove the code that hides the thank you parent element, and also to add code that hides the rating parent element.
I noticed you are using a <form> tag with a <button type="submit">. This is good, but you'll notice that clicking the submit button has the default effect of reloading the page. This means that if even if you were to set everything else up correctly, you would only see the second "page" for an instant before the page refreshed. Check out https://developer.mozilla.org/en-US/docs/Web/HTML/Element/input/submit for more details.
You can prevent this default behavior at least two ways that I know of. The first is in JavaScript using the event.preventDefault() method. You can check that out here: https://developer.mozilla.org/en-US/docs/Web/API/Event/preventDefault . The second method is using HTML. On your <form> tag you can use the onsubmit attribute. That would look like <form onsubmit="return false">. Both methods will prevent the page from reloading.