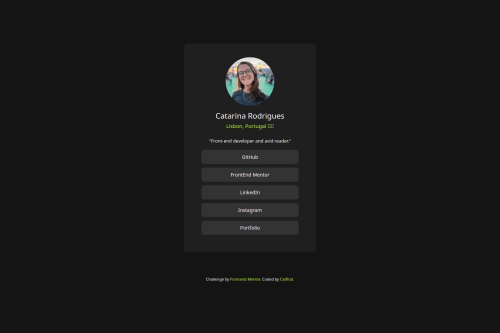
Design comparison
Solution retrospective
I love that I could personalize it with my own links.
What challenges did you encounter, and how did you overcome them?The most challenging thing was to change the underline effect, because I nested a div inside the link š
What specific areas of your project would you like help with?I'd like to know your sincere opinion of what would you do differently!
Community feedback
- @StroudyPosted about 2 months ago
Hey, Great job with this solution you should be proud, A few things I noticed,
- Missing a
<meta>
description tag for SEO purposes, - Setting a height and I can see you have added a width attribute to your
<img>
This will increase performance to reduce layout shifts and improve CLS, It reserves the space on the page for the image, - It is best practice to have a
<main>
tag inside your body highlighting the main section. - Links rely on colour to be distinguishable, This applies to your
.attribution
, Low-contrast text is difficult or impossible for many users to read. Link text that is discernible improves the experience for users with low vision. - āUsing
max-width: 100%
ormin-width: 100%
is way more responsive then justwidth:100%
, check out this article also from the same Frontend mentor dev responsive-meaning, she goes into more detail. - You should avoid using
px
as it is an absolute unit and not a responsive unit likerem
orem
, You should look at this article from a Frontend mentor dev, Why font-size must NEVER be in pixels. - Another great resource for px to rem converter.
@media
should also be in relative units likerem
orem
,- You should apply a full modern reset to make things easier as you build, check out this site for a Full modern reset
- Using a naming convention like BEM, Using proper naming will prepare you for the changes in design of the website.
- It is best practice to use
margin-inline: auto;
to center left and right then than justmargin: auto;
, You can center the height by using this code snippet
min-height: 100svh; display: flex; justify-content: center; flex-direction: column;
I hope you found some of this information helpful, You should give the articles a good read and I look forward to seeing some more from you, Happy coding! š»
Marked as helpful1 - Missing a
- @Nico243Posted about 2 months ago
When adjusting an image we always use width and height
img { height: 80px; width: 80px; border-radius: 50%; }
You must take the following out of your HTML as it's making an oval:
width="200px"
Your image should look great now!
Let me know if you need more help, this is great practice for me!
Marked as helpful0 - @Nico243Posted about 2 months ago
First off! It looks great I have a few suggestions that might be of interest.
You said you fixed the <h2> </h3>, It didn't appear to have changed on your code.
It could be of the following reason:
When we make changes on our code in VSC it doesn't update on our live page automatically so we have to do it manually on VSC's terminal
You could achieve this with the following steps.
- git status (You'll see files in the color of red, this mean it's new changes)
- git add . (This adds all files, be careful not to add files your not suppose to)
- git commit -m "Updated HTML (or relevant changes)"
- git push origin main
your new files/updates should be uploaded to the internet now. It takes about 30 - 40 seconds before you'll see any changes.
happy coding
Marked as helpful0 - @Nico243Posted about 2 months ago
- If you have a figma account you can create a new file
- Then select import
- You want to go to your social-links-profile-figma
- open the social-links-profile.fig file
This would import all the details that you need with color coding and sizes which makes it easier to navigate through.
This is going to be helpful the further you go along with this course
0
Please log in to post a comment
Log in with GitHubJoin our Discord community
Join thousands of Frontend Mentor community members taking the challenges, sharing resources, helping each other, and chatting about all things front-end!
Join our Discord