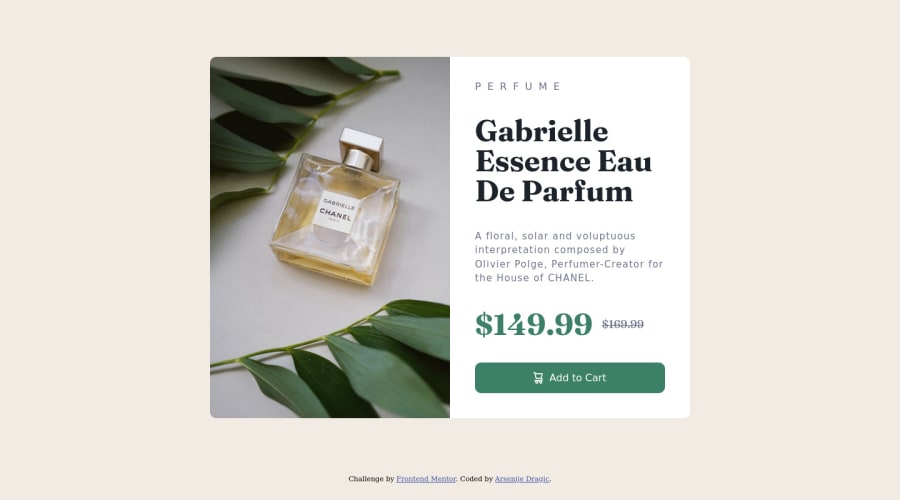
Design comparison
Community feedback
- @RichardOgujawaPosted almost 2 years ago
Hi Arsenije,
Hope you're keeping well:) I really like your coding solution, especially the fact that you indented your code. It makes it easy to read. I appreciate how you used comments to write headings in your CSS to make it more easily navigable.
However, I would make some changes to the code. Then again these are just my opinion so feel free to take this on board or take it with a grain of salt, I wish you all the best either way.
In the HTML:
- I'd recommend wrapping the main content of your project with a main tag, even if it's the only element on the page.
- Check out BEM Naming convention to make naming classes easier and also to make it easier for other developers to understand your code better.
- Heading levels are used for the most to least important text on the page, since that's the case I'd recommend having the 'perfume' text as a h2 because it can be considered as a category tag, and leave the price as spans or paragraph text.
- I'd recommend using an article tag for the product card as a whole, because it would be regarded as a piece of content that can be understood without any information around it, which is all an article really is in HTML (https://developer.mozilla.org/en-US/docs/Web/HTML/Element/article)
- It isn't the best idea to use the <s> tag to put a line through your text because it results in that bit of text not getting read out by screen reader software. More on that here: https://www.tempertemper.net/blog/be-careful-with-strikethrough Instead, you could just wrap that bit of text in a span and do something in the CSS like text-decoration: line-through (https://www.w3schools.com/cssref/pr_text_text-decoration.php)
- I wouldn't recommend using class="heading" for a heading tag. If you want to describe the heading tag better I'd recommend something like class="title" or class="subtitle", etc.
- When it comes to HTML you want to make it as meaningful and descriptive as possible. If something is a button you want to use a button tag, if something is a paragraph use a p tag, etc.
- I'd recommend using a picture instead of just the image tag because it's a much better way to add responsive images to your websites instead of just relying on CSS. CSS simply scales up and scales down an image, so if you use only one image to cater for the fact that it would be on both larger screens and smaller ones, you'd have to use a high-resolution image in your src for the image tag. However, not all users need that high-resolution image, and would prefer to load a lower-resolution one because their device might be slow as is, or they may just be using a device with a smaller screen and therefore loading a high-resolution file would be overkill, because even though it's scaled down it's still a high-resolution file meaning it's a large file to load. More on all that here: (https://blog.bitsrc.io/why-you-should-use-picture-tag-instead-of-img-tag-b9841e86bf8b).
- Also when it comes to heading levels, they should only ever decrease by one at a time, so you shouldn't ever really have a page with say a h1, h3 and h4. If you only have three headings levels on a page, it should go down by one level at a time, i.e. h1, h2, h3. Because at the end of the day heading levels are used for ranking headings from the most to least important on the page.
- Icons and image (unless it's purely decorative) should have an alt text attached to it. The only other time you may not want an alt text on your icons is when it's beside text that essentially describes what it is, such as an icon of a happy dog beside beside text that says 'happy dog' because if you include the alt text the screen reader would end up reading out "happy dog, happy dog."
In the CSS:
- An easier way to center content in a container would be to use {display: grid; place-content: center;}
Hope this helps:) And if you want me to explain anything a bit better just let me know, I was trying to keep this not too long, so I had to rush through some concepts.
Marked as helpful1@ArsenijeDragicPosted almost 2 years ago@RichardOgujawa Hi!
Appreciate your feedback! I went over it briefly as I'm preparing to finish my day and the concepts you mentioned seem pretty useful. I will definitely dive deeper tomorrow as I'm always eager to learn new things.
Constructive feedback is always welcome. Thank you very much!
0@RichardOgujawaPosted almost 2 years ago@ArsenijeDragic Happy to hear that and happy to help. And as always feel free to let me know how it goes, and if you want to go over anything.
All the best!
0@ArsenijeDragicPosted almost 2 years ago@RichardOgujawa Hi, hope you're doing well.
I updated my solution using the methods you told me about earlier. When you have time, can you please check it out and let me know your thoughts? Please do keep in mind that these things are still brand new to me so I might've got some of them wrong (feel free to point out).
In addition, i noticed that i wasn't able to apply "border-radius" to my article tag for some reason.
Also, please ignore that the dimensions are a bit off.
Appreciate your help!
0@RichardOgujawaPosted almost 2 years ago@ArsenijeDragic I'm all good bud, hope you're keeping well too!
Yeah, would be more than happy to, I'll check it out now and will share my thoughts after.
I'll take a look at the border-radius one first since it's something you pointed out. And don't worry about not getting it perfect, as you specified you're new to it, these things will come with time. All you need to be focused on is being better than you were yesterday.
And the dimensions for mine aren't perfect either so it's okay man don't worry 😂, these challenges aren't really about getting things pixel perfect, they're more about being able to get the structure right from a visual stand-point and also improving your code with the help of tips, comments and remarks from the FrontEnd Mentor community. I'd say you're doing great so far👌🏾
0 - @RichardOgujawaPosted almost 2 years ago
Hey Arsenije,
First of all, I just want to say that I’m happy to see the improvements you made. Whether or not they were perfect doesn’t matter, all that matters is that you’re aware of and trying out new concepts.
I’d also like to say thank you, because in the course of writing this comment I learned a few things myself, some of which I’ll share with you below.
I didn’t make all the changes I wanted to make because I’m a little bit busy at the moment unfortunately, but the only remaining change really is just changing the font, and spacing (padding and margin) values from fixed values (pixels) to relative units (rem and em).
Also, all the changes I made are in between comment tags that say ”Changes” at the top of it and “End of Changes” at the bottom.
Anything commented out is code that you wrote that I changed, and anything typed in between the changes comment is code I added.
You can find all the changes on your Github as pull requests.
Some points to mention: The Picture element:
- The picture tag didn’t work too well when I tried resizing the page on the live site, and I think that’s because you used both max-width and min-width when defining the media queries in the sizes attribute. There’s nothing wrong with using them both, it’s actually probably better to do it that way. For your media queries something I learned recently is that you can simply use min-width for mobile first designs or max-width for mobile first designs, and then for the screen sizes in between you could do media queries that specify a range, for example between 414px and 768px, which is where you’d utilise both min-width and max-width.
- I proposed a fix in the HTML of simply taking out one of the media queries. I offered two methods to achieve the same result. The first one, which I commented out so it doesn’t disrupt the flow of the website, focuses on max-width and simply specifies that it wants an image of 384px to display on devices up to and smaller than 687px, and then the 300px after the comma simply means that for all other screen sizes display an image that is 300px. I gave the smaller screen size the bigger image width in this media query because the mobile image in the directory is wider than the desktop one, so the browser will choose it over the narrower desktop one when it’s choosing an image for the mobile view.
- There was also an issue with the picture not being wide or tall enough to fit the component, which was simply fixed by giving the image element itself a width and height of 100% and an object-fit of cover so that it will crop however way it needs to to always fit the specified dimensions of 100% width by 100% height of the container element.
Border-radius problem
- To fix the border-radius problem, I simply took off the flex box properties you used on the product card in the mobile view, such as justify-content and flex-wrap. The border radius will only work If the container’s corners are wrapped around the corners of the content, but the flex box properties were pushing the content to the centre of the box, and the corners of the content were far from the corners of the product card. If you want to see what I mean, go into your original code, go into the mobile view for your site, and give your product card “outline:3px solid red” to see were it’s corners are in relation to the corners of your content.
- Removing the flexbox properties, took away the gap between the containers corners and the corners of your content, and allowed the border-radius to therefore, affect it.
- All that was missing now to see this effect is to add an “overflow:hidden”, so that the container will clip any content that extends outside of it.
Minor changes
- I’d recommend using a flex box instead of a grid for the layout. If you’re making something more complex, i.e. something that has more than one row or more than one column, then a grid is advised, but otherwise flexbox is a better option, is easier to code and generally requires less lines of code to get up and running.
As always, if you want any help going over anything I said, just let me know:) Happy coding!
Marked as helpful0@ArsenijeDragicPosted almost 2 years ago@RichardOgujawa Thank you very much for doing this 🙏. You're awesome!
I'll go through it when I have time, and let you know if I have any additional questions.
Have a great day!
0@RichardOgujawaPosted almost 2 years ago@ArsenijeDragic Happy to help 👌🏾
Hope you have a great day too!
0@ArsenijeDragicPosted almost 2 years ago@RichardOgujawa Hi,
I applied all of the changes you recommended, and it makes perfect sense. Off to the next challenge.
Appreciate the help!
0
Please log in to post a comment
Log in with GitHubJoin our Discord community
Join thousands of Frontend Mentor community members taking the challenges, sharing resources, helping each other, and chatting about all things front-end!
Join our Discord