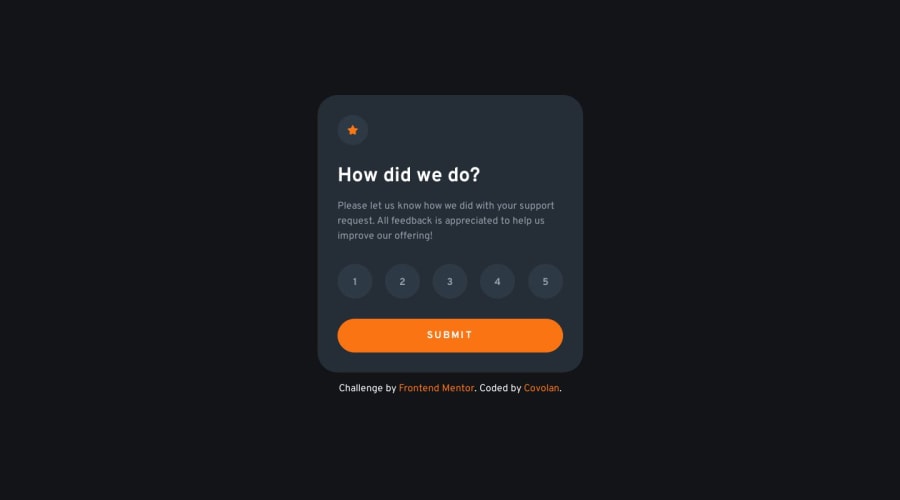
Interactive rating with SASS and vanilla JavaScript
Design comparison
Solution retrospective
Hi Frontend Mentor community 👋
This is my solution on the interactive rating component. Overall I had a really good time giving the page some style and animation. The JS part was challenging and fun to deal with. I believe that the JS part could be smaller, perhaps using jquery, any tips regarding the script or the CSS part?
Thanks in advance for the feedback and the tips!😄
Community feedback
- @Dev-MV6Posted about 1 year ago
Hi there, there are several things you can modify to improve your code:
-
In order to avoid repeated code when selecting elements from the DOM, use JavaScript loops or combine
Document.querySelectorAllandArray.forEachmethods, for example:Instead of doing this ❌
const btn1 = document.getElementById("1")
const btn2 = document.getElementById("2")
const btn3 = document.getElementById("3")
const btn4 = document.getElementById("4")
const btn5 = document.getElementById("5")

btn1.addEventListener("click", () => console.log("Button 1 clicked!"))
btn2.addEventListener("click", () => console.log("Button 2 clicked!"))
btn3.addEventListener("click", () => console.log("Button 3 clicked!"))
btn4.addEventListener("click", () => console.log("Button 4 clicked!"))
btn5.addEventListener("click", () => console.log("Button 5 clicked!"))
Do it like this ✅
// Select all the elements in the DOM with the "clickable-button" class const buttons = document.querySelectorAll(".clickable-button") buttons.forEach((button) => { // The following will be executed for each item of the 'buttons' array button.addEventListener('click', () => { console.log(`Button ${button.id} clicked!`) }) }) -
Always use
classNameinstead ofid: If multiple elements share the same functionality or style, it's better to use a common class name instead of individual IDs. -
Use more descriptive names for your variables; this will help you a lot in the future to not get lost in bigger projects and collaborative environments where code readability is key.
-
Avoid modifying CSS styles with JavaScript directly, instead assign the styles you want to a class name in your stylesheet and toggle the class using JavaScript:
Do not change style properties with Javascript directly ❌
btn.style.backgroundColor = 'hsl(25, 97%, 53%)'
btn.style.color = 'white'
Assign the styles to a class name in your stylesheet ✅
/* Normal state */
.rating-button {
  background-color: hsla(212, 20%, 37%, 0.26);
  color: hsl(217, 12%, 63%);
}

/* Selected state */
.rating-button--selected {
  background-color: hsl(25, 97%, 53%);
  color: #fff; /* white color in hexadecimal (avoid using color names) */
}
Whenever you need to apply/remove the styles to an element you just have to add/remove the class
rating-buttonfrom the element like this:// Add the class with the styles btn.classList.add("rating-button--selected") // Remove the class with the styles btn.classList.remove("rating-button--selected")
Finally, here's a simplified and optimized version of your script (I left some variable names without changing so you don't get confused but remember to use more descriptive names for your variables in the future):
// Variable to track the currently selected button
let selectedRatingButton
// Select all elements in the document with the `rating-button` class
const ratingButtons = document.querySelectorAll(".rating-button")
// Add event listeners
ratingButtons.forEach(btn => {
  btn.addEventListener('click', (event) => {
    handleRatingButtonClick(event)
  })

  // You can also pass the function directly as argument to the addEventListener method like this:
  // btn.addEventListener('click', handleRatingButtonClick)
})

function handleRatingButtonClick(event) {
  const clickedButton = event.target // Get clicked button from the event object
  if (selectedRatingButton === clickedButton) {
    // if clicked button is the currently selected button
    return // Do nothing
  } else {
    // Remove styles from the currently selected button if defined
    selectedRatingButton?.classList.remove("rating-button--selected")
    clickedButton.classList.add("rating-button--selected") // Add styles to the new button
    selectedRatingButton = clickedButton // Store as currently selected button
  }
}

// Submit form
const form = document.getElementById("form")
const number = document.getElementById("number")
const rating = document.getElementById("rating-state")
const thank = document.getElementById("thank-state")

form.addEventListener("submit", (event) => {
  event.preventDefault()
  rating.style.display = "none"
  thank.style.display = "flex"
  if (selectedRatingButton) {
    number.innerText = selectedRatingButton.innerText
  } else {
    // No rating selected
    number.innerText = "0"
  }
})
I really hope you find this information helpful. Good luck! 👍
Marked as helpful2@covolanPosted about 1 year agoHi @Dev-MV6 👋 Thanks for the feedback
That is very helpful, I will be sure to begin using classnames as selectables and start using the query selector, its waay more pratical and keep the code clean. Overall I learned a lot from your code and also I will begin to use more descriptive names!
Thanks again for the help 😄
0 -
Please log in to post a comment
Log in with GitHubJoin our Discord community
Join thousands of Frontend Mentor community members taking the challenges, sharing resources, helping each other, and chatting about all things front-end!
Join our Discord
