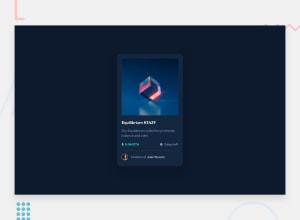
Design comparison
Solution retrospective
I am a complete beginner at HTML and CSS. I found this a difficult challenge. I know that my code does not allow for mobile friendly devices. I am still trying to figure that out along with alot of other things that I need to improve on. I was able to replicate the challenge in my own way, but it definitely is not a good way. I would like any feed back on how I could make this code better and learn how to make it a more reliable and successful site.
Thank you
Community feedback
- @riverCodesPosted over 2 years ago
Hi! Congrats on completing the challenge :D First off, don't be too harsh on yourself! The content inside the card looks great. The fact that you are commenting your code is impressive. The design doesn't need to be responsive in this challenge so don't worry about it being mobile-friendly.
The main issues that you have at the moment is centering your main component (which will tackle the mobile-screen issue) and the light-blue eye overlay on the image hover. You also have a few Accessibility issues. Lets see how you can fix those:
- For your Accessibility issues first,
-put alt attributes on your images and icons. -Change your div.container to main.container (<main class="container">). -The whole page needs to have at least one <h1> tag.- Check out this resource https://every-layout.dev/layouts/cover/. It provides a standard way of centering your component that you can use in a lot of these single-card frontend-mentor challenges. In short, apply this CSS to your body tag:
min-height: 100vh
display: flex;
flex-direction: column;
align-items: center;
justify-content: center;
What this will do is, force your <body> tag to cover 100% of the viewport height (by default, element heights usually depend on inner content height). Then you can turn your <body> into a flex-container, and then use flex-properties to center your content. Then, apply this CSS to your <main>:
margin-block: auto;. Now your content is properly centered!- Coming to the issue of the image overlay, what you have done by wrapping your image with a <a> tag is absolutely correct. From there,
-you need to set a `position: relative` on your <img>.
-then, create two <img> pseudo elements ::before and ::after. use `position: absolute;` on these.
-on the ::before, set a `content: ""; (empty string), then style it to cover 100% of your <img> and give it the blue color.
-then, set a `content: url(eye-icon-url);` on the ::after. Position it to be at the center.
-then, set both ::before and ::after to show only when hovered on the image. (use :hover pseudo classes)
This has been quite a long comment, I hope it is helpful! Good job and keep learning :D
0
Please log in to post a comment
Log in with GitHubJoin our Discord community
Join thousands of Frontend Mentor community members taking the challenges, sharing resources, helping each other, and chatting about all things front-end!
Join our Discord
